

Walkthrough for Death's Gambit guides the player through all areas of the game, highlighting all possible items, enemy encounters and NPCs that may be found. For a quick overview of areas, please refer to the Game Progress Route instead.
Death's Gambit Walkthrough
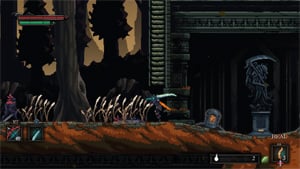
Gaian's Cradle is a Locations in Death's Gambit. Players begin the game here, and will face their first boss, the Owlking.

General Information
- Previous: N/A
- Next: Rider's Passage
- Recommended Levels: Any
- Bosses: Owlking
Video Walkthrough
Gaian's Cradle Map
[map goes here]
NPCs in the area
Bosses
Mini-Boss
Items
Consumables
- Crow's Plume x1
- Leaf of Gaia x1
- Lucent Plume x1
- Feather Upgrade x1
Weapons, Spells & Armor
Keys & Other
Enemies
- Stone Sentinel (Moss Knight)
- Stone Sentinel (Lightning)
- Hallowed Knight
- Swords
- Shield and Halberd
- Bowgun
- Blue Slime
Full Gaian's Cradle Walkthrough
Interlude
The game starts with a dialogue between a humanoid character called Vreal, and the player. Once that exchange is over, continue forward and by talking to death, the player becomes immortal. Players can destroy their contract with Death to make their death permanent. Once done, get on your horse traveling eastbound. Eventually, you'll come across an Alpaca in the distance, it will be of use to us later.

Once players run into a wall, climb it and follow the path to find a Crow Plume, reading the inscriptions along the way to grasp a better understanding of the controls of the game. As you walk onto the platform with the item, it will collapse. Climb the ladder to obtain the Logoth Shortbow and use it to break the chain directly above you, holding up the ramp. Descend down it and jump onto the Alpaca, then onto the platform to grab the Leaf of Gaia. Now mount your stead and travel eastward until you come across a shining statue.
This is the first save point, which is near to the first interactive object; interacting with it will open up access to a path you just passed. Head left to jump on the newly-formed platforms to take the ladder up to a platform holding your first enemy of the game: a Stone Sentinel (Moss Knight). After defeating him, you'll receive 22 shards, and new platforms for you to take up will appear. Vrael will speak to you and provide you with a Lucent Plume. Use the platforms to reach and climb up the ladder to another save point.
From here, head left to find a passageway filled with melee and ranged Hallowed Knights. After the jump to face the first ranged enemy, the player can jump up to claim the Zealot's Cape, then jump across to get the Wooden Targe as well. Heading back towards the left, you'll find two more ranged enemies leading up some stairs. Defeat them then climb the ladder, and use the moving platform to climb the next to fight the enemy on top and retrieve the Fragile Courage item by dropping down afterwards. Head back up both ladders and moving platforms to arrive at another save point.

After passing this save point, players will be taught their abilities as the game pits them against two Hallow Knights, then a Stone Sentinel (Moss Knight). After the tutorial, you will find the second interactive object which upon activating, will trigger a very brief cutscene. Back track past the logs to where you should take the ladder next to the save point.
Going Up
From there onward head up, ascending the ladder and take out the Hallowed Knights you meet there. Jump the gap, climb the ladder and continue on the path. You'll notice a blue slime enemy on the first ruins, these drop onto you and poison you, try to avoid them. At this time a large Phoenix will rain fire down over the level, leaving a few spaces that are unexposed to the flames. At the same time, there will be a range of Hallow Knights along the path which you need not take on, and can leave them to the flames, still earning shards and their drops in the process. There is also a Reinforced Helm to be looted. At the end of the path is a Stone Sentinel (Lightning) that must be defeated to progress.
The platform will open up and dropping -while moving left- will land you on a platform above the next save point, next to the Covenant Shield. When you reach the bottom, on the left there will be a Feather Upgrade and a Hallow Knight in a barrel. On the right, you'll find a ladder and a living chest; the chest must be damaged until its destroyed to gain the Aura it possesses. Climb the ladder while avoiding the fire to gather the last Owlking Tome.

Travel to the left and fall down into a partially flooded area to fight off another two of those Blue Slime, and collect some Crystal Bombs on the right.
Fighting Ione
Head left now to encounter a sub boss called Ione. Here are a few tips to defeating her:
- Avoid her crashing downward attack by using the pillars around you as cover.
- She isn’t too difficult to defeat if you hit and run to gain energy to unleash your abilities.
- Most of her combos are 2-3 hits and she can deal a decent amount of damage, so wait out her hits and take it easy some distance between you to scope out the fight.

Defeating her will grant you 1 Skill Point, and the ability to activate the third and final interactive object to unlock the boss. Make sure to climb the ladder just above the interactive object to collect the Quickened Plume.
Big Boss Time
Head left until you come across a character by the name of Fink (visit his page on instructions on not aggroing him). There's a ladder behind him you can take to meet your horse near the bottom of the level. You will ride throughout Rider’s Passage until you reach the save point. There is also a door that needs a Gaia Key to access. Dismount your stallion and proceed to the right to fight the boss.
Boss: Owlking
Owlking will likely start the fight with a lunge attack, either roll through him or create some distance. Sneak in a couple of attacks but don’t exhaust all your stamina. When he summons his rift, wait for the beams to approach and roll through them to counter attack the Owlking or walk towards the side of the map but roll before they touch you.
Owlking melee attacks have a tell indicating he is about to do the following:
- Summons a rift that sends out triple purple beams
- A lunge attack
- An uppercut attack
- sometimes followed up with another
- An X attack
You can watch this fully in action which includes gameplay of both the Gaian’s Cradle and Owlking stage below
Gaian's Cradle Video
Gaian's Cradle Map
[map goes here]
Tried to do some mortal runs here are the stories Mortal Run 1:Wizard Died to shaman tricking me into spikes Mortal Run 2:Wizard Died to phoenix Mortal Run 3:Wizard Died to phoenix Mortal Run 4:Acolyte of Death Died to phoenix Conclusion:I hate phoenix Solution:Become mortal after the phoenix fight
2
+10
-1